After a knee replacement surgery, it will take some time before you can be cleared to dive into some physical activities. Once your physician has cleared you to do so, the first thing you’ll want to do is improve the physical strength and mobility of the knee.
Well, you probably wouldn’t want to dive into squats at the gym immediately, right? It’s wiser and safer to start with something simple which raises the question- can you do yoga after knee replacement? As it turns out, yoga is just as effective as it is safe as far as flexibility, mobility, and physical strength are concerned.
For the longest time, yoga has been sought after as a training component for the conditioned athletes just as much as it has been preferred as part of a post-surgery healing routine. After all, having a fully functioning knee will offer the appropriate level of support to the quads, hamstrings, and calf.
At the end of the day, it all comes down to being able to bend your knee at a good enough range. This way, you’ll be able to regain your independence much faster and get back to doing the things you love.
Before we get started, however, it’s important to note that not just any yoga pose will be good on your knees. That being said, let’s get started.
Which Yoga Poses Should You Avoid After Knee Replacement?
Everyone’s body is different. As such, it’s important to listen to it since a pose that works best for you could not be viable for the next person. Even so, there are a couple of poses that will inevitably do more harm than good to a delicate knee.
The Hero’s Pose.
To achieve this pose, you’ll have to keep your knees close together while at the same time separating your feet till they’re about 20 inches apart (depending on your size). The goal here is to create enough space for your butt to fit when you come down to the floor such that while the feet are separate, the knees will still be close together.
As you exhale, lower your butt to sit on the floor; you might have to manually move your calves out of the way to achieve this while at the same time ensuring you sit between and not on your feet. Speaking of feet, they should be turned straight back and shouldn’t turn inwards or outwards.
Next, slide your shoulders away from your ears then rest your hands on your lap. Maintain this pose for about a minute then release.
The Child’s Pose.
Not as complicated as the hero’s pose, the child pose involves you getting on your hands and knees. Next, place a pillow, yoga bolster, or large cushion between your legs or along with your calves then slowly sit down on it while extending your arms in front of you.
Depending on the range of motion, you may not be able to sit back fully on your heel which is also the dangerous thing about this pose as it could put too much weight on the knee than necessary.
Yoga Poses To Stick To For A Healthier Knee
Below are a couple of yoga poses you should pay attention to when it comes to knee replacement and yoga.
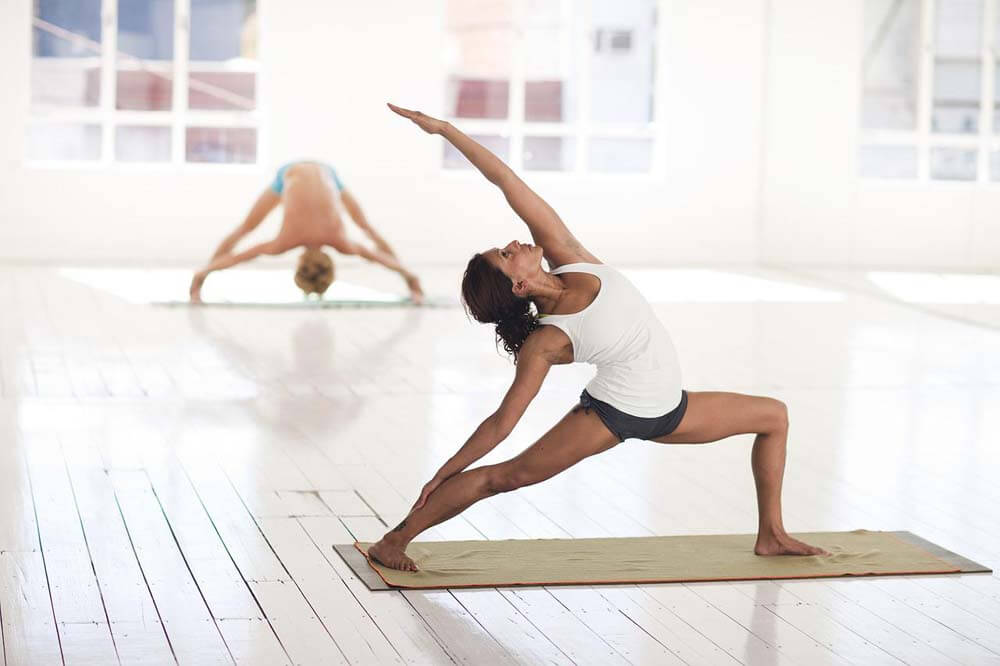
Warrior Two Pose
Probably the most popular yoga poses to start with after a knee replacement, this pose is meant to strengthen your quads. But how is this important?
As mentioned earlier on, strengthening the muscles surrounding the knee. with this pose, your quadricep muscles will really be engaged, and to begin it, first stand tall with both feet at about hip distance (mountain pose).
Depending on your knee stability and whether or not it is sensitive, you may or may not need something to stabilize your posture- a wall or a chair would do.
Once you are stable, place the working foot (say right) forwards and step the other one back so that you’ll now be at a much wider stance. Next, bend the right knee while at the same time having the toes point in the same direction as your knee. Next, without locking the knee joint, ensure that you try to keep your left leg as straight as possible.
Next, with your left foot still back, turn the foot outward in such a way that you maintain alignment with your right knee so that you establish a strong base. You must ensure you maintain your center of gravity at your pelvis as well to avoid putting more pressure on the working knee.
As you are working your way into the lunge, ensure your right knee is aligned over your heel. Having it too far forwards will put too much pressure on the knee. Last but not least, ensure your right thigh is parallel to the floor which should be enough to provide enough tension to the quads and hamstrings.
Even when you’re at an angle, make sure the left foot is firmly pressed into the yoga mat then allow some pressure to reach the outer edge of the foot. This way, the muscles in your left leg will be engaged too so that you get a stable posture.
To add icing to the cake, you could go ahead and achieve the classic representation of the pose by extending your arms out over your legs. This should however be done if your knee is stable with your body weight shifted to the working knee, otherwise, feel free to brace yourself and support yourself on a wall or chair for balance.
The Bridge Pose
Yet another yoga posture that’ll help you regain your leg strength after knee surgery is the bridge pose. The bridge pose involves bending your back. The good thing about this pose is that you can achieve it with a prop and activate your hamstrings, glutes, and hip flexors just as efficiently as you would without a prop.
To start the posture, lay on your back first. Next, bend your knees and at the same time have your feet firmly planted on the ground such that your knees will be directly above your ankle bone. If, however, the recovering knee doesn’t have that much range of motion, step your feet slightly forwards.
Next, step your feet slightly wider apart while at the same time ensuring your toes are pointing in the same direction as your knees. This is done to offer a greater range of motion when you move into the posture while at the same time being able to maintain a proper alignment in your knee joints.
For better leverage and stability, you could have your toes against a wall. While in the pose, lift your hips in the air and hold them there each time you exhale and hold them for 15 to 20 breaths each time you exhale. It’s amazing what this will do to the leg muscles around your knee joint.
To assist the pose…
To make it even better, you could go ahead and bend your elbows at a 90-degree angle then press your triceps downwards to maintain the lift.
This could feel a little strenuous at times and in case it does, slide a yoga block underneath for you to sit on. This way, the hips will be lifted and at the same time, you’ll be able to relax your body.
Savasana Pose
This pose involves relaxing your body after you are done with the yoga poses. Simply have your back on the yoga mat for several minutes with your legs extended out and arms relaxed.
This serves to allow the muscles surrounding the injured knee to relax after the stretches. Remember, resting is just as good a part of recovery as the different poses.
Final Verdict
Well, there you have it. other than just knowing about knee replacement and yoga. You have the different yoga poses you should avoid after knee surgery and you also have instructions on how to achieve the best poses.
However,
At the end of the day, safety is paramount and as such, you must be careful enough not to put too much strain since this could extend the recovery period.